Most people think vibrant, restaurant-quality plating comes from special tools, ring molds, or fancy sauces. But the truth is this: the fastest way to elevate any dish is by choosing the right colors.
Color is the first thing the eye sees. Before texture, before shape, before flavor — color sets the tone. And once you learn how chefs use the Color Wheel, you’ll know exactly how to make food look fresher, brighter, and instantly more appetizing.
Here’s how to use simple color principles to make your plates camera-ready in seconds.
1. Start With a Hero Color
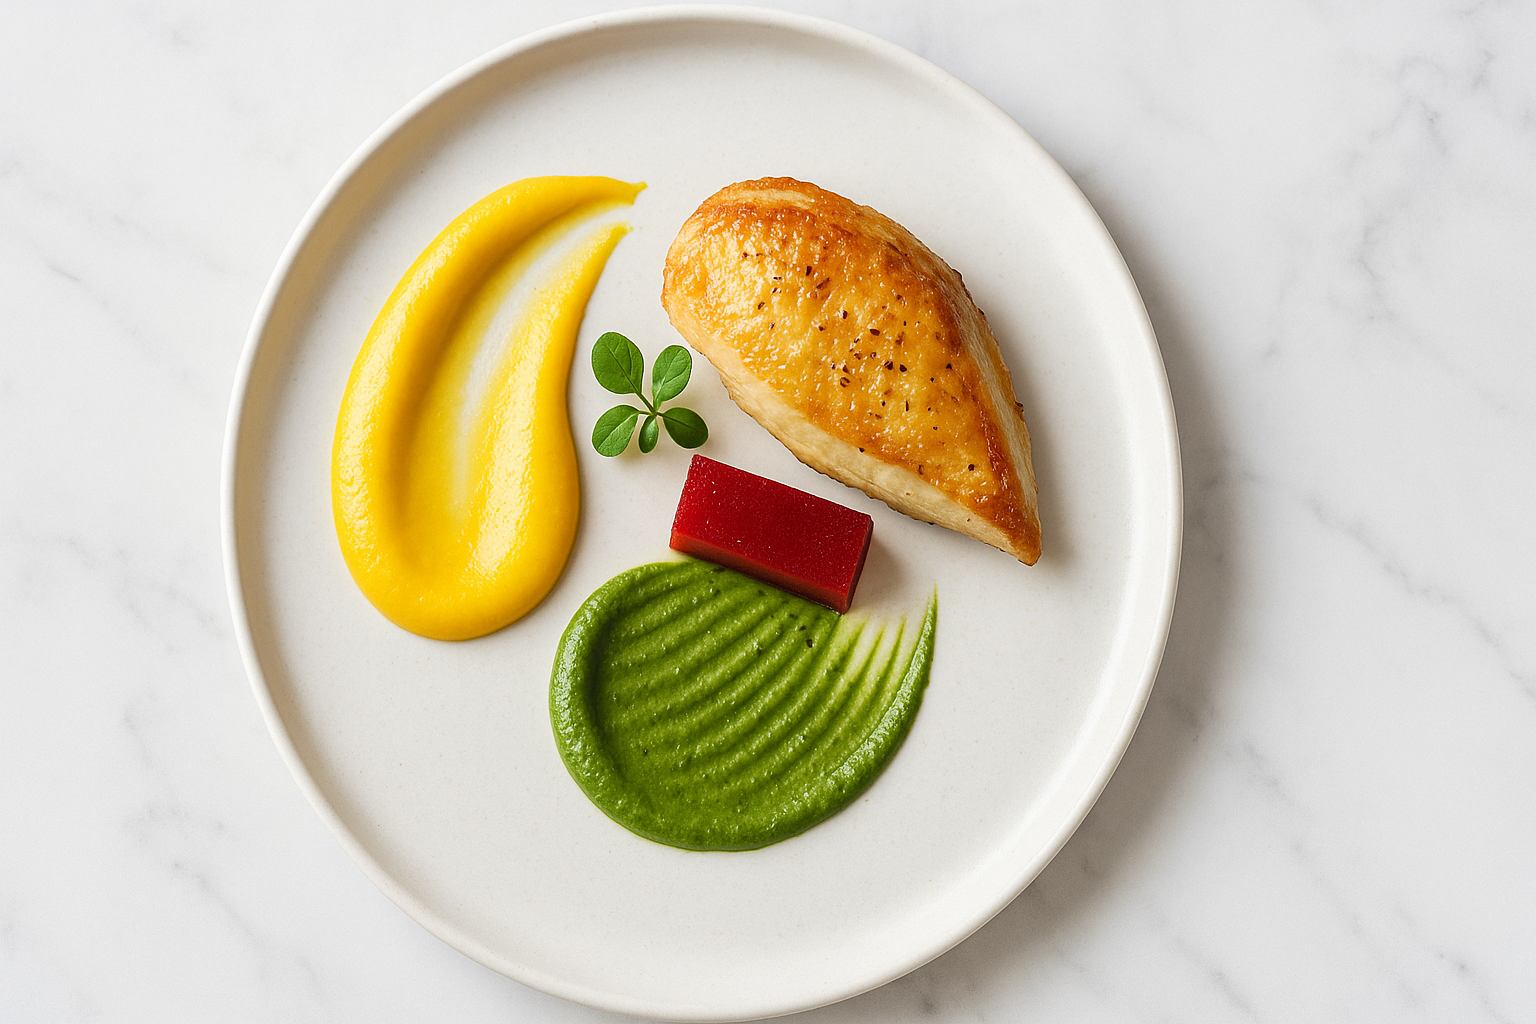
Every beautiful plate has one color that takes the lead. It might be the deep red of roasted beets, the bright green of herbs, or the golden crust on a chicken thigh.
Pick your hero, and let everything else support it.
Try these ideas:
Bold Centerpiece
Choose one ingredient with a strong natural color — salmon, carrots, pomegranate, chimichurri — and build the dish around it.
→ Gives the plate focus and keeps it from looking chaotic.
Bright Against Neutral
Place your hero color on a white or lightly colored base (mashed potatoes, cauliflower purée, couscous).
→ Makes the main color pop instantly.
Color Echo
Repeat the hero color in small accents, like microgreens, citrus zest, or a garnish.
→ Creates harmony and makes the dish look intentional.
2. Use Contrasting Colors for Instant Visual Energy
A plate wakes up when two opposite colors meet. Chefs use contrast the way photographers use lighting — to create attention.
Easy contrast pairs:
- Orange + Green (carrots and herbs)
- Red + White (beets and yogurt)
- Yellow + Purple (corn and red cabbage)
- Pink + Black (salmon and black sesame)
Ways to use contrast:
Opposites on the Plate
Put your main color on one side and its opposite color as a garnish or sauce.
→ Adds movement and makes the eye travel across the dish.
Contrast in Small Doses
If the main ingredient is strong, use the opposite color sparingly. A few drops of a bright sauce or a sprinkle of herbs is enough.
→ Keeps the plate elegant instead of loud.
3. The Neutral Rule: White, Beige, and Brown Are Your Anchor
Neutrals do two important things:
- They help bright colors stand out.
- They add warmth and “deliciousness” that the camera loves.
Use neutrals for:
- Bases (purees, rice, grains)
- Roasted elements (potatoes, mushrooms, chicken skin)
- Bread, crackers, or crisp elements
Think of neutrals as your background canvas.
→ They let your hero color shine without competing for attention.
4. Add a Fresh Pop of Green
There is no color that makes a dish look fresher than green. Chefs rely on it constantly.
Try:
- Herbs
- Scallions
- Microgreens
- Pea purée
- Olive oil drizzle
A hint of green brings life back to heavy dishes and makes warm colors feel balanced.
→ Green is the easiest “fix” for plates that feel too brown, beige, or orange.
5. Stick to One or Two Main Colors
Just like with flatware techniques, simplicity wins.
Start with:
- One hero color
- One contrasting accent
That’s all you need to make a plate look thoughtful and artistic.
Avoid mixing too many bright colors — instead, repeat or support the ones you already have.
→ This creates harmony and prevents the dish from looking cluttered.
6. Practice With the Food You Already Make
Tonight, take whatever you’re cooking — pasta, eggs, stir-fry, leftovers — and try one of these:
- Add a fresh herb for a pop of green
- Plate your main ingredient on a neutral base
- Add a small contrasting color (pomegranate, citrus zest, pickled onion)
- Repeat your hero color in a garnish
Small color choices change the entire mood of the plate.
Closing Thought
Plating isn’t about being fancy — it’s about being intentional.
Once you understand the Chef’s Color Wheel, you can make any dish look vibrant, fresh, and camera-ready using the ingredients you already have.